


- Defining colors on the panel.
- Three main columns.
- Customizable menu.
- Internal search engine.
- Prepared for advertising 125 × 125.
- Widgetized footer.
To install see the video tutorial and our mini-guide installation. You can also read our frequently asked questions and learn about common problems and solutions.
Settings
To correctly display the template must follow these steps:
- Enter the "Layout" tab and then "Edit HTML".
- To customize the navigation menu looks the following code:
Replaces "Edit" in the link text and the symbol "#" in the URL (web address). Copy and paste this same line to add and edit more options to the menu.<li class="page_item"> <a href="#"> Edit </ a> </ li> - To display the date correctly, go to the Settings tab and the "Format". In the section header date format, select the menu option penultimate.
- Save the changes and go!
This template is distributed as is "without guarantees or support operation, however, you can visit our forum where you can surely find the solution to your problem or post if you have not been exposed before.
1. Download a template and unzipp.

2. Go to the Layout section in your blog (Dashboard → Layout → Edit HTML ).
3. Supports your previous template (Download full Template).

4. Find and upload your template.
5. Enjoy your new blog design.
Why I can not install templates blogger? Blogger throws an error.
There are several possible factors that cause an error Bx-xxxx:- The code is directly copied, and Blogger did not interpret it.
- Temporarily not accepting Blogger templates with certain codes or gadgets.
- Remove widgets or gadgets that come with the template downloaded.
- Clear your browser’s cookies.
- Trying to upload the template with a different browser (Opera, Firefox, Chrome, etc).
- No copy and paste the code directly, upload the xml file.
- Wait 24 hours and try again.
The navigation bar of Blogger is just a plug and provides a shortcut to enter your blog, but you can always log in from Blogger.com.
How do I customize my template?
For color and the font size, some Blogger templates offer an option to change it from the Dashboard (Dashboard → Layout → Fonts and Colors). Here you can see the result directly in the template.Major changes in the templates needed to know at least a little CSS and HTML. A quick way to modify a template is change the images in the CSS code, for others with the same dimensions. That is the process to change the header of a design, for example.
Additionally, some templates have their own settings instructions and customization, refer to the same download page of your template.
How can I edit the menu of my template?
1. Most templates have a menu that can only be changed from the HTML (Dashboard → Layout → Edit HTML). In many cases the code to look for is: <li class='current'><a expr:href='data:blog.homepageUrl'>Home</a></li>
<li><a expr:href='data:blog.homepageUrl + "feeds/posts/default"'>Posts RSS</a></li>
<li><a expr:href='data:blog.homepageUrl + "feeds/comments/default"'>Comments RSS</a></li>
<li><a href='#'>Edit</a></li>2. Some templates include a gadget to edit the menu directly from the Dashboard (Dashboard → Layout → Page Elements).
Why the date is listed as "undefined" or this is not shown?
Probably because you do not choose the date format specified. The format should be changed from the panel (Dashboard → Settings → Formatting → Date Header Format) and usually the correct type is: Saturday, 5 May, 2009.
Read the instructions of your template located on the download page.
Why some images in my template disappeared?
Although we host the largest number of images in Blogger, images may suddenly disappear because:- The images were removed from the original hosting.
- Use own domain (eg btemplates.com).
How to add the comment form to my template?
Blogger recently added the Comments Form within the same template, below the individual posts, if your template does not have the form there, you may need to manually add it or activate it.To add it manually:
- Enter in the code of your template (Dashboard → Layout → Edit HTML) and search for:
<a expr:href='data:post.addCommentUrl' expr:onclick='data:post.addCommentOnclick'><data:postCommentMsg/></a> - Replace that code with the following:
<b:if cond='data:post.embedCommentForm'>
          <b:include data='post' name='comment-form'/>
        <b:else/>
          <b:if cond='data:post.allowComments'>
            <a expr:href='data:post.addCommentUrl' expr:onclick='data:post.addCommentOnclick'><data:postCommentMsg/></a>
          </b:if>
        </b:if>
- Enter the options panel comments (Dashboard → Settings → Comments).
- And in the "Comment Form Placement" section, select: Embedded below post.
On the menu: Many templates show the feed in the top menu, to change the default feed for feedburner, go to your template code (Dashboard → Layout → Edit HTML) and search for:
<a expr:href='data:blog.homepageUrl + "feeds/posts/default"'><a href='URL del feed en Feedburner'>How do I translate my template to another language?
Directly in the template code. (Dashboard → Layout → Edit HTML), with a really simple process:- Using the browser search, find the text you want translate.
- Replaces that text with your translation.
What should I do after I install my template?
After installing a template, there are several things worth to check, update or modify, we recommend you to read our article with all the points.How to display the navbar again in my template?
Easy! Enter in the code of your template (Dashboard → Layout → Edit HTML) and search for:#navbar-iframe {
height:0px;
visibility:hidden;
display:none
}How to display the last posts or comments on the sidebar?
- Enter the administrator page elements (Dashboard → Layout).
- Add a new feed widget, with the following URL’s: To show the recent posts:
To display the latest comments:http://BLOGNAME.blogspot.com/feeds/posts/default
http://BLOGNAME.blogspot.com/feeds/comments/default
Can I remove the credit for the template?
No, the vast majority of templates are licensed under a Creative Commons, GPL or similar license, thus removing the credits would be using an illegal copy of the same. You can simplify the credits or relocate, but not remove them. Remember that the templates are free, so keep the credits is a way to thank those who designed and / or adapt the template.What does the icon of a gold medal in some templates?
We calle them Free Premium Templates and highlight it with this icon because have an excellent graphic quality, are well designed for Blogger, bring additional features and / or are compatible with the major browsers (Firefox, Chrome, IE).I sent a template, why is it not published?
Usually we receive a big number of templates, we try to publish as soon as possible and ensure a minimum quality in the published templates in Blogger Templates, some of the criteria that we use to approve a templates are:- An acceptable graphic and technical quality.
- Compatible with most browsers.
- No installation errors or easy to correct.
- A license that allows distribution

1. Go to HTML edition and find these lines to edit the menu bar:
<li><a href='/' title='Home'>Home</a></li>
<li><a href='#' title='About me'>About me</a></li>
<li><a href='#' title='Contact'>Contact</a></li>
<li><a href='#' title='Favorites'>Favorites</a></li>
<li class='rss-now'><a href='/feeds/posts/default' title='RSS'>Subscribe</a></li>
2. Create a new HTML/Javascript widget and paste the folloswing code:
<form id="searchform" action="/search" method="get">
<div><input id="s" value="" name="q" type="text"/>
<input id="searchsubmit" value="Search" type="submit"/>
</div>
</form>
3. Create a 760 x 100px logo in a png transparent backgrpund (the template does not include psd logo). Search for "Grunge fonts" on Google and install any new font in Windows/Fonts directory. Then host the image and replace it by the logo.png image in the template.
*Template tested in IE 7, IE 8 and the latest versions of Chrome, Firefox and Opera.
| Description: | Woody is a free blogger template adapted from WordPress with 2 columns, right sidebar and grunge style. Excellent layout for blogs about personal issues. |

Installation And Set Up
Change The LOGO.
Go to Edit HTML
please find this image Address:
https://blogger.googleusercontent.com/img/b/R29vZ2xl/AVvXsEiOJcXj433vT2SVoWUOmxg-6sj6lSYwGz5V-KvQU8-7cYF9FWTanxhnnpVtNmNLdBFpiJ0AfjjpvVDgVEY1HVwYG_HrITb-_L31MIA4B1epmdhMR8hRN0G_MJuz1e-1-_YYI-Is5g7IEe3-/s1600/logo.png
after that, change it with your own image logo.
HOST YOUR JAVASCRIPT (JS)
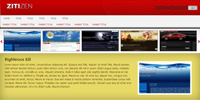
The Zitizen use JS feature, like slider, glider, and tabber; because of that, you need to find any web that facilitating about the JS hosting. For example: fileave.com
Host all the JS file into the web, and put in the into the template.
Find this words below:
<script type="text/javascript" src="YOUR-JAVASCRIPT-HOSTING-LOCATION/jquery-1.2.6.min.js"></script>
<script type="text/javascript" src="YOUR-JAVASCRIPT-HOSTING-LOCATION/slider.js"></script>
<script type="text/javascript" src="YOUR-JAVASCRIPT-HOSTING-LOCATION/glide.js"></script>
<script type="text/javascript" src="YOUR-JAVASCRIPT-HOSTING-LOCATION/tabber.js"></script>
Change the YOUR-JAVASCRIPT-HOSTING-LOCATION with your own.
SET UP THE MENU BAR
The First Menu
- Sign in to blogger
- Go to Layout -- Edit HTML tab
- No need to check Expand widget template
- Find (Ctrl+F) this below:
<li><a href='#'>Title Here</a></li>
Then, You will find like this:
<li><a href='#'>Title Here</a></li>
<li><a href='#'>Title Here</a></li>
<li><a href='#'>Title Here</a></li>
<li><a href='#'>Title Here</a></li>
<li><a href='#'>Title Here</a></li>
Please, change # symbol with your targeted address.
Change the word Title Here with your own title.
The Second Menu
find this (Ctrl+F) :
<li><a href='PARENT-LINK-ADDRESS'>PARENT TITLE</a>
below that code, you will find like this:
<li><a href='PARENT-LINK-ADDRESS'>PARENT TITLE</a>
<li><a href='PARENT-LINK-ADDRESS'>PARENT TITLE</a>
<li><a href='PARENT-LINK-ADDRESS'>PARENT TITLE</a>
<li><a href='PARENT-LINK-ADDRESS'>PARENT TITLE</a>
<li><a href='PARENT-LINK-ADDRESS'>PARENT TITLE</a>
<li><a href='PARENT-LINK-ADDRESS'>PARENT TITLE</a>
Please, change PARENT-LINK-ADDRESS with your own targeted address.
After that, change the word PARENT-TITLE with your own title.
Save your template
Auto Slider
Every content in slider have HTML structure. Below, I would explain how to make one content of the Slider. After You make it one, you can build another contents by copy-paste below the previous one. Here it is the structure:
<div class="panel">
<a href="LINK-ADDRESS"> <img class="ethumb" src="YOUR-IMAGE-ADDRESS" alt=""/> </a>
</div>
Please Change the words :
LINK ADDRESS --> with your own targeted link
YOUR IMAGE ADDRESS --> with your own image address. Please, Remember that the image size is 100px height and 200px width.
To edit that, you could use wordprocessor, notepad, or any software. Oh yes, almost forgot,
You can fill in the Slider widget maximum 12 contents.
GLIDER CONTENT
<div class="glidecontent">
<div class="inpost">
<h2><a href="YOUR-TITLE-LINK-ADDRESS" title="TITLE"> TITLE </a></h2>
<p> YOUR TEASER POST </p>
</div>
<img src="YOUR-IMAGE-ADDRESS" alt=""/>
</div>
Please Change the Words :
TITLE --> with your own title. Example: Batman is back or etc.
YOUR-TITLE-LINK-ADDRESS --> with the link where the post is located. Example: http://www.cahayabiru.com/templates/single.html
YOUR-TEASER-POST --> with post which can make your reader teased. Example: LOREM IPSUM
YOUR-IMAGE-ADDRESS --> with the address where your image located. Example: http://www.imagehost.com/bla/bla.jpg
You could fill in the Glider widget in only 6 contents maximum.
Set up your Feedburner ID:1. Please go to Blogger Edit HTML :
2. Sign in to Blogger
3. Click The “Layout” Tab
4. Click “Edit HTML”
5. No need to check the “Expand Widget Template” box
6. Find (Ctrl+F) this text:
CahayaBirusSphere
After that, change it with your ID.
7. Save your Template